Many people feel deep panic after deleting precious photos from their iPhones. These digital memories often seem lost forever if you do not have backups. You might feel overwhelmed by technical steps or worried about making big mistakes. iPhones offer native tools and backup options to restore photos, but they have limitations.
For situations where these methods fail, tools like Dr.Fone data recovery software can guide you. Thus, you can recover your files by following this very careful stepwise plan. Therefore, this article explains a step-by-step plan to help everyone restore deleted iPhone photos.
Part 1. How to Recover iPhone Photos Using the “Recently Deleted” Folder
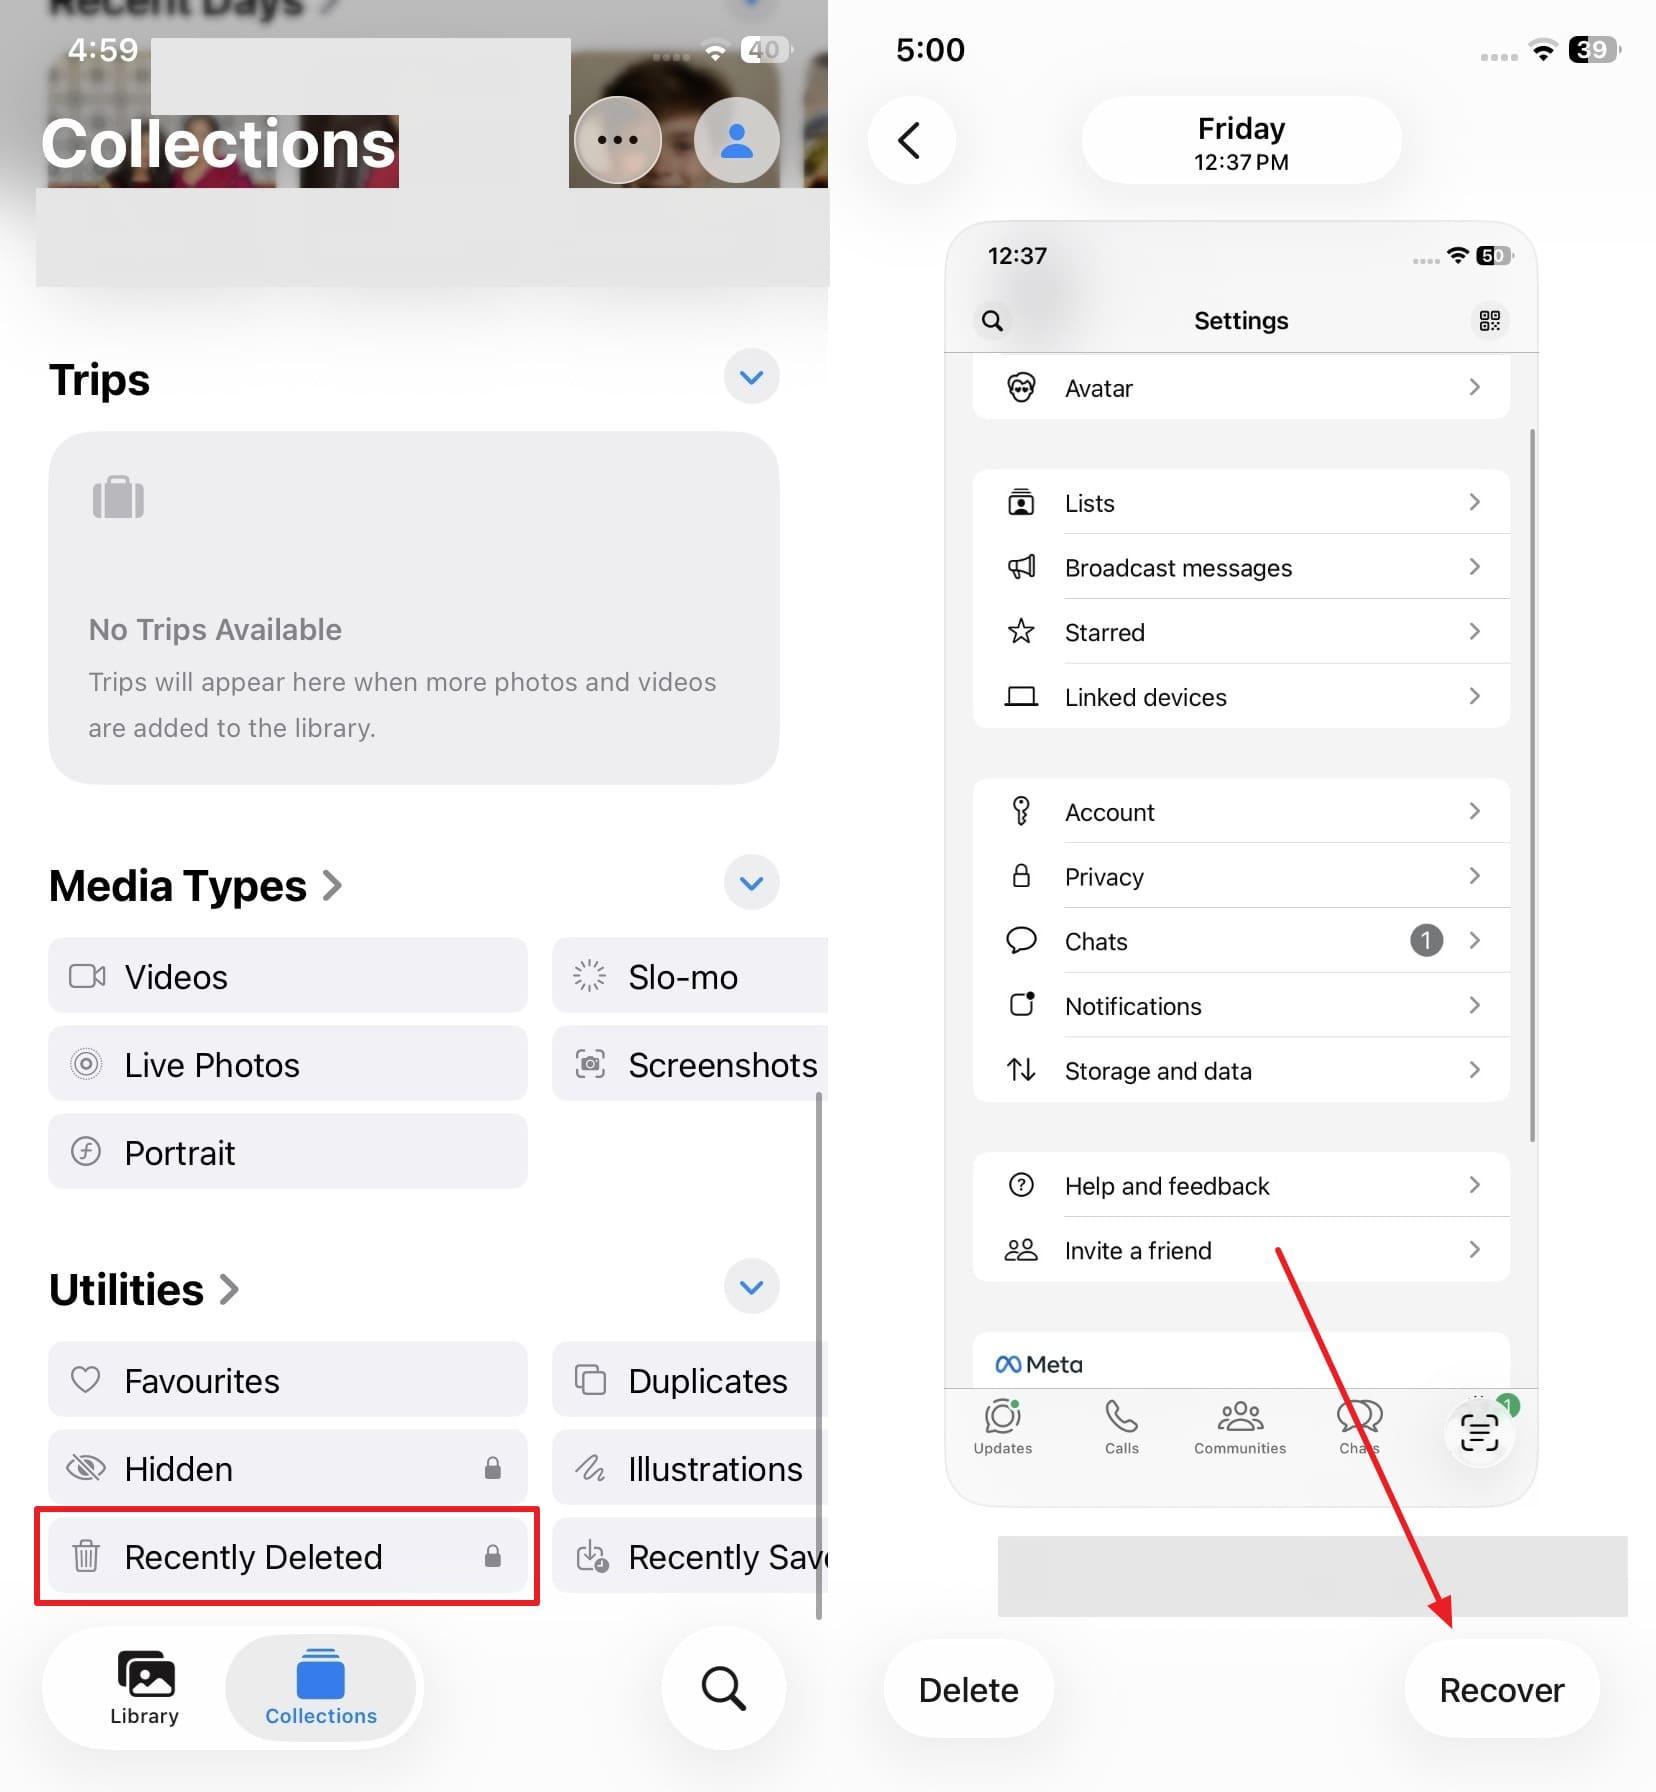
The first step for many users is checking the phone’s native trash folder. This hidden album or “Recently Deleted” folder acts as a safety net for any recently erased images. Alongside this, it stores your files for 30 days before they disappear from the system. You do not need a computer or a cloud account for this method. Thus, adhere to the steps to learn how to recover deleted photos from iPhone:
Instructions. To initiate, open the “Photos” app and go to the “Recently Deleted” folder. Find the deleted photo, then tap “Restore” to recover it to your library.
Part 2. Check iCloud Photos and Sync Settings to Prevent Data Loss
Your iCloud account stores copies of images you erased by mistake. These cloud settings can either save your memories or sync the deletion. Understanding how this system works is vital for your long-term data safety. Sometimes the cloud fails, making you look for iPhone data recovery software later. Checking these settings now can help you find your missing photo files. Let’s explore how you can check your cloud sync settings:
Step 1. Upon heading to your device’s “Settings,” go to “Apple ID” and access “iCloud.”
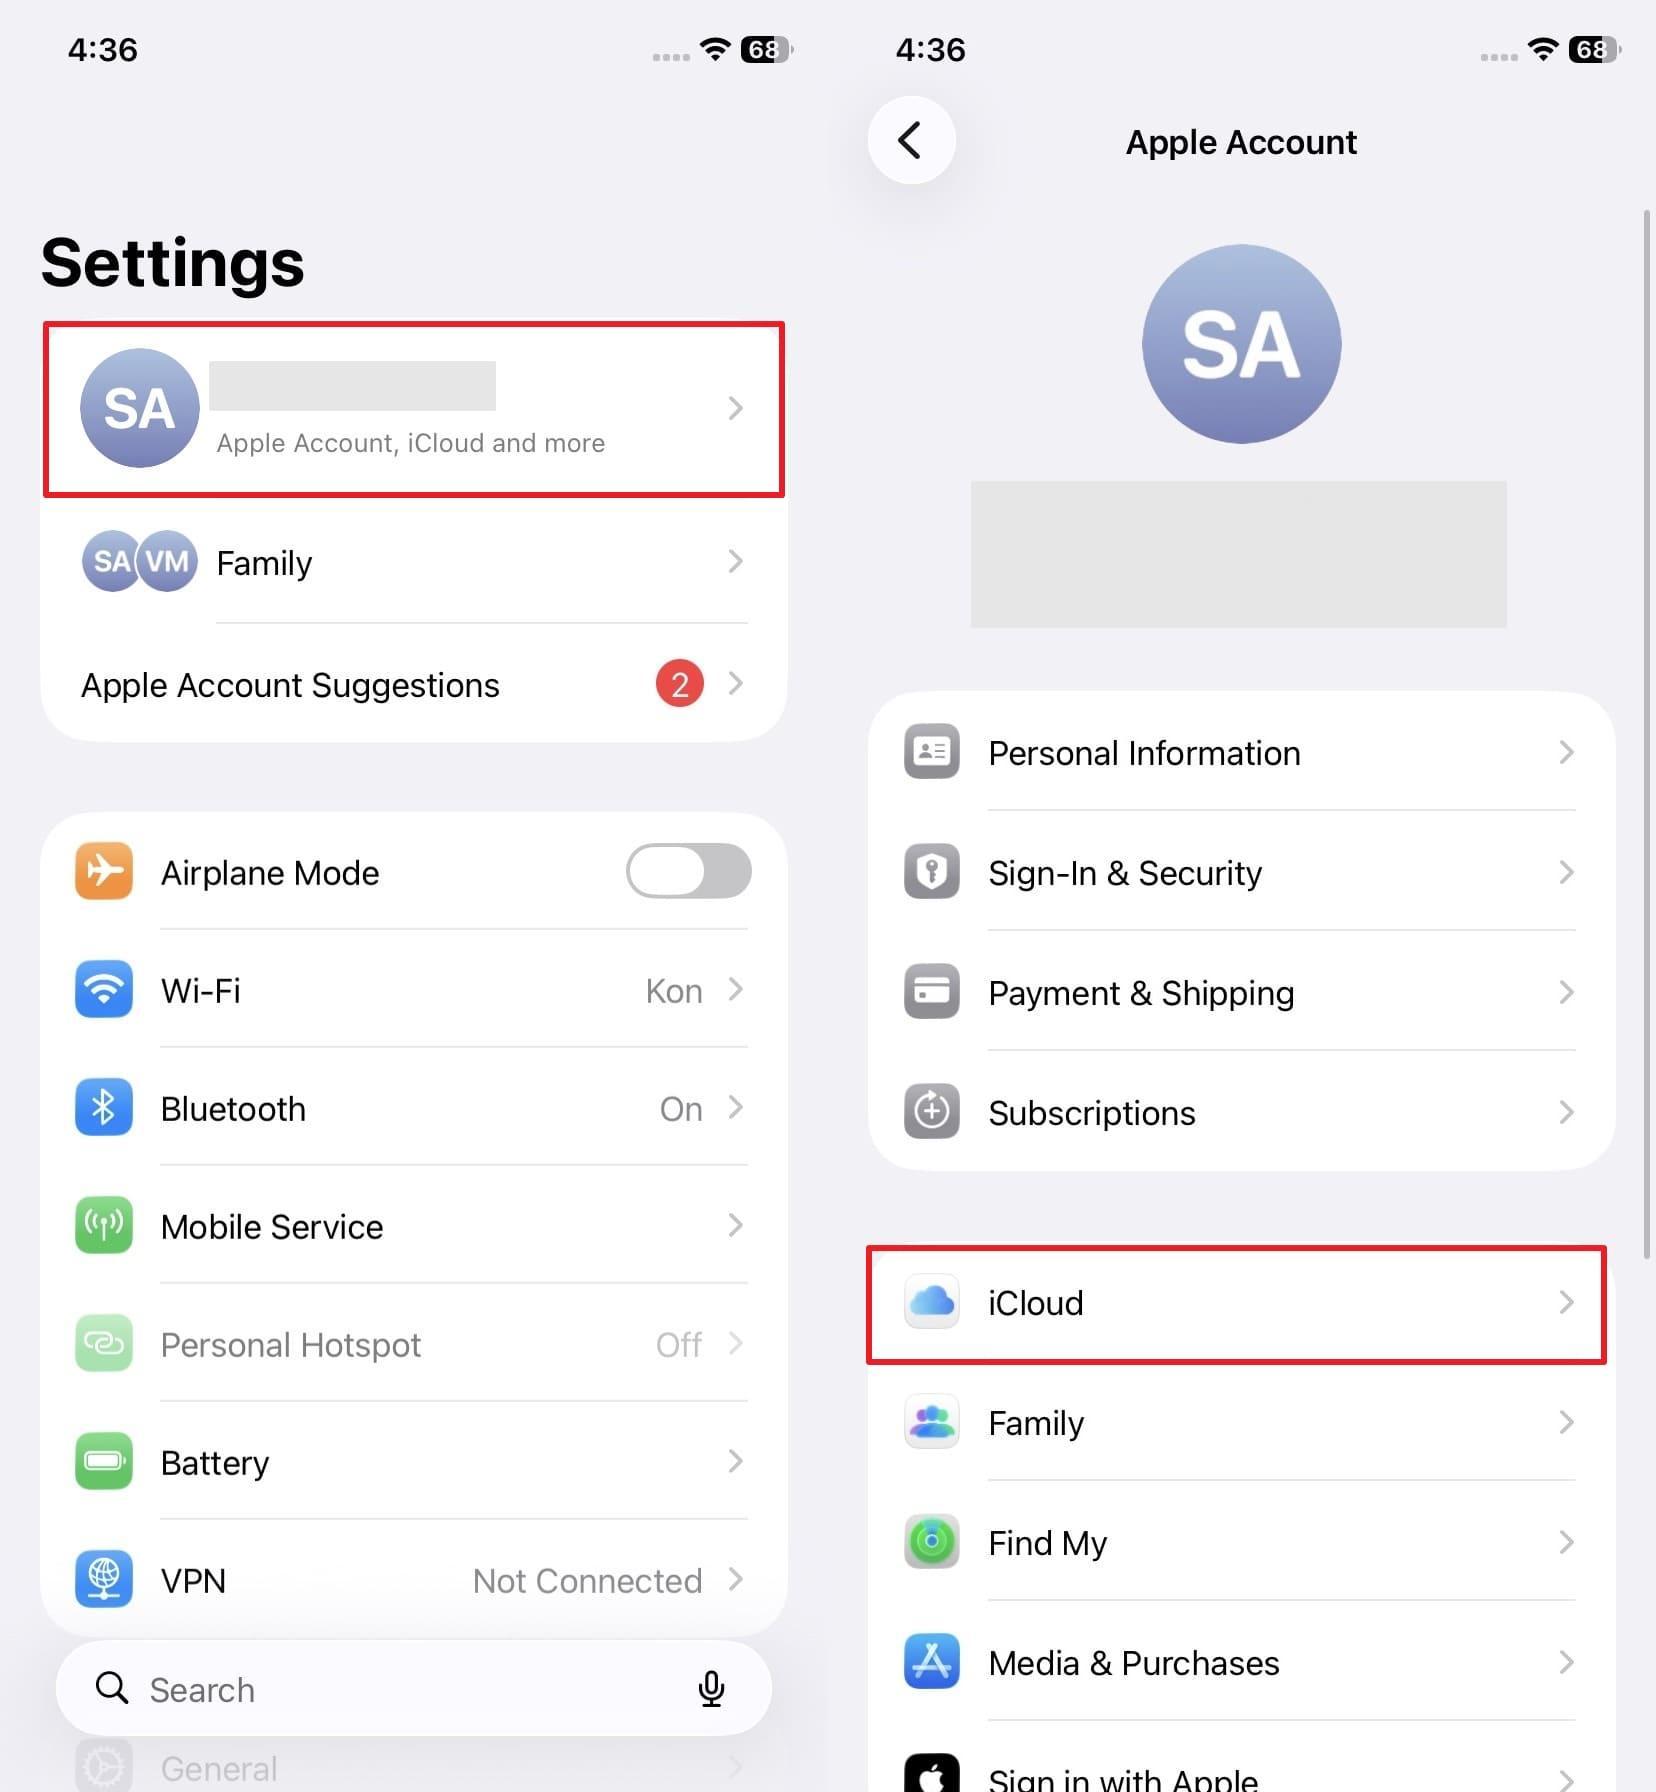
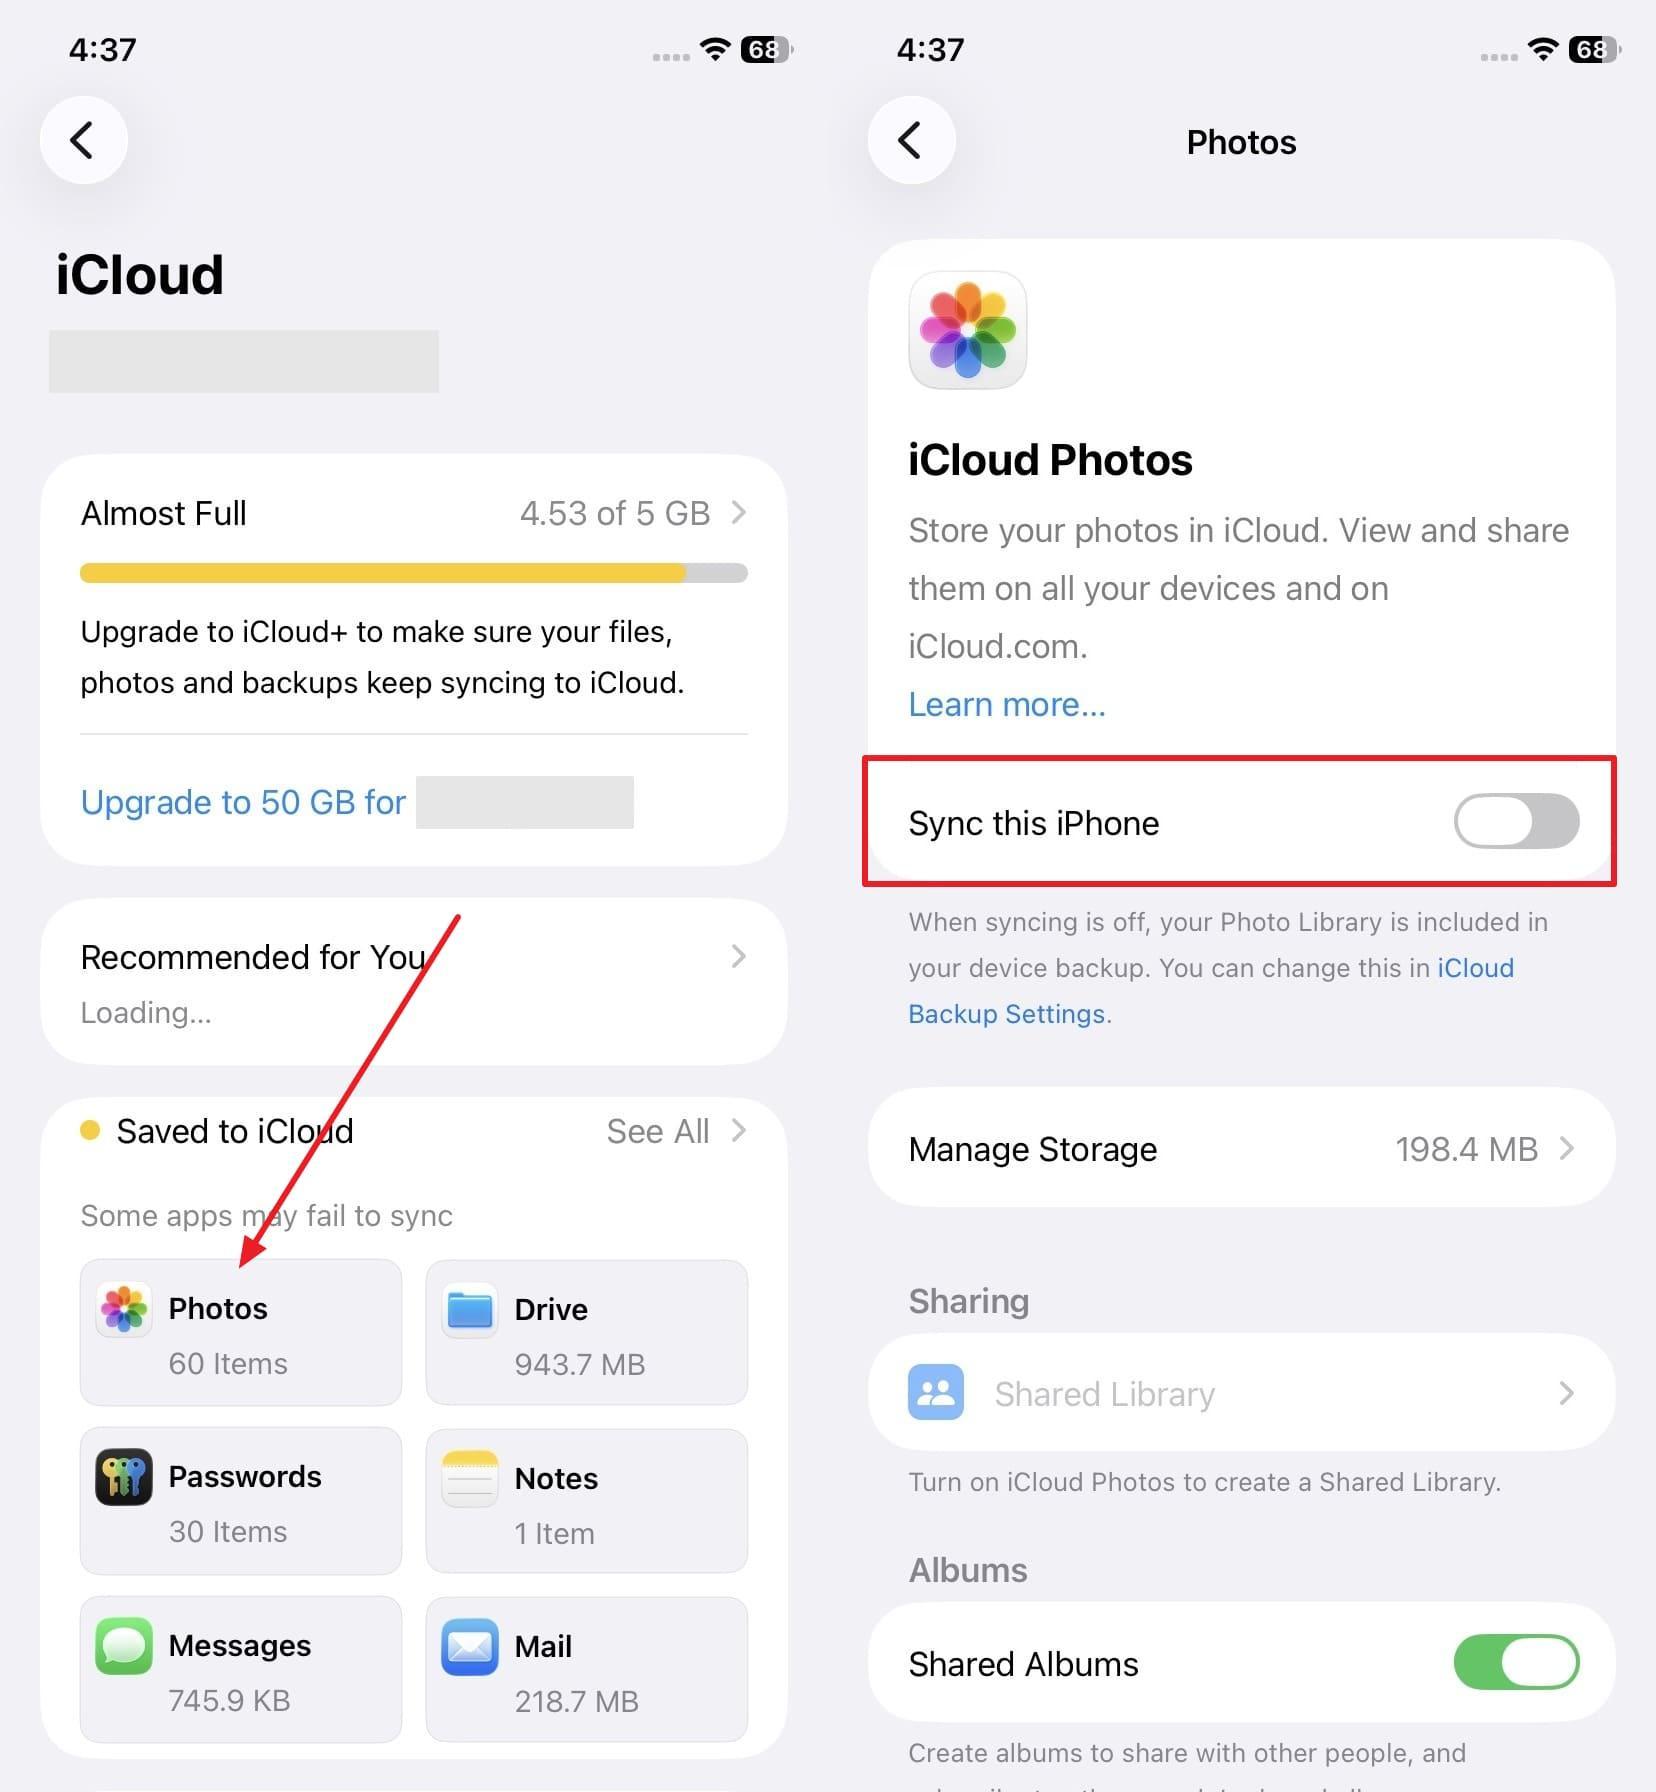
Step 2. Tap the “Photos” section from the following screen. After that, enable the “Sync This iPhone” toggle if it’s off, restoring your synced photos.
Part 3. How to Use Backups Carefully to Avoid Overwriting
Using official backups is a very powerful way to get your photos back. However, you must be extremely careful when performing a full system restore now. Standard Apple restores, like iCloud or iTunes, replace all the new data on your mobile device. This means you might lose recent messages or new photos during this process. You should always create a fresh backup before trying to restore old files.
This safety step ensures you do not lose your most current digital information. Moreover, checking your last backup date helps you see if the photos exist there. If the backup is too old, it may not contain your deleted images. Many users prefer using a computer to manage these large data files. Using a cable provides a more stable connection than using a wireless network.
Part 4. When to Use iPhone Data Recovery Software for Deleted Photos
When photos disappear everywhere, iPhone data recovery software becomes the needed rescue path. Below are clear situations showing when such tools truly help recover photos:

- Device Damage: A broken phone that connects to a PC might still allow photo scanning. Such tools access memory directly when the screen or system will not open normally.
- Time Limit: Photos removed more than 30 days ago are deleted from the Recently Deleted albums. After this period, normal restore options fail, and only scanning methods remain available.
- Backup Missing: If no backup exists, deleted photos cannot be restored using Apple’s restore features alone. Recovery tools may scan storage deeply to find remaining photo traces safely still.
- Hidden Copies: Some images remain inside app chats or cloud traces after deletion. Advanced scanners search these locations to recover photos that are not visible normally.
- Fast Recovery: Running recovery soon prevents new data from overwriting the deleted photo storage space areas. Waiting too long lowers success because old data gets replaced permanently inside storage.
Part 5. Recover Deleted iPhone Photos with Dr.Fone – Data Recovery (iOS)
Photos vanish from your phone, leaving you worried and searching for solutions fast. Still, Dr.Fone data recovery software helps recover missing photos without complex steps. This advanced tool performs a thorough internal storage scan to locate hidden and deleted data fragments. You can even choose specific files instead of restoring everything from backup storage archives. Moreover, it restores lost data after jailbreak or firmware flashing problems without risk.

Users can also recover files affected by malicious attacks without spreading harmful software. The tool enables checking recoverable items before restoring, so you avoid unnecessary recoveries. Plus, it retrieves backup data from iTunes or iCloud without a full device reset. Dr.Fone also helps recover Apple iWork documents from iCloud Drive storage safely. Furthermore, you can restore deleted WhatsApp media, including “View Once” photos and video files.
Key Features
- No Backup: Retrieve data even when no backup exists on cloud or local storage.
- Secure Recovery: The recovery process keeps files safe and never shares data online with servers.
- Data Variety: Recovers 35+ types of deleted data, including media and important files.
Detailed Guide to Recover Deleted Data iPhone Photos via Dr.Fone
You can use this simple guide to see how to recover deleted photos from an iPhone. This professional software makes the entire restoration process very fast and effortless. Thus, follow these specific steps to get your precious digital memories back to your phone:
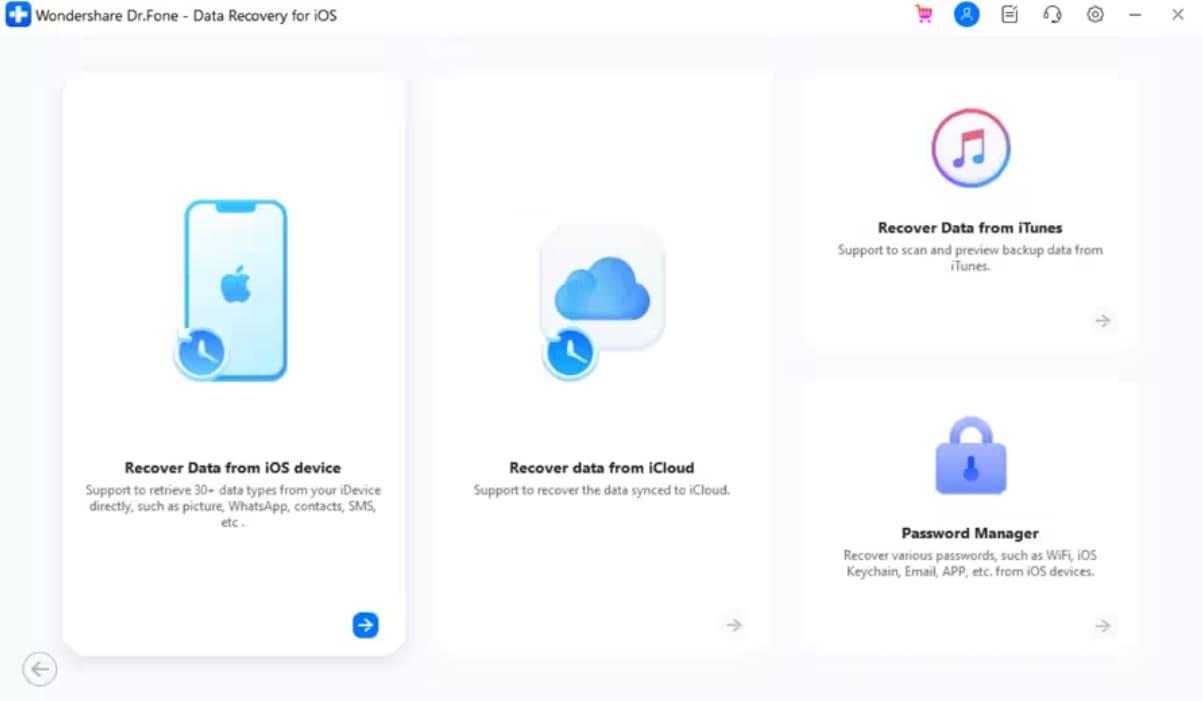
Step 1. Open the iOS Recovery Tool of Dr.Fone
Go to the “Toolbox” section and choose “Data Recovery” for iOS from the options. Select “Recover Data from iOS Device” to begin the process, then connect your iPhone.
Step 2. Select Deleted Photos Type to Scan
When your device appears, pick the photo file types, along with other preferred data. Following this, click “Start Scan,” so the program searches the storage and finds deleted items.

Image name: drfone-data-recovery-software-8.jpg
Image alt: choose deleted iphone photos
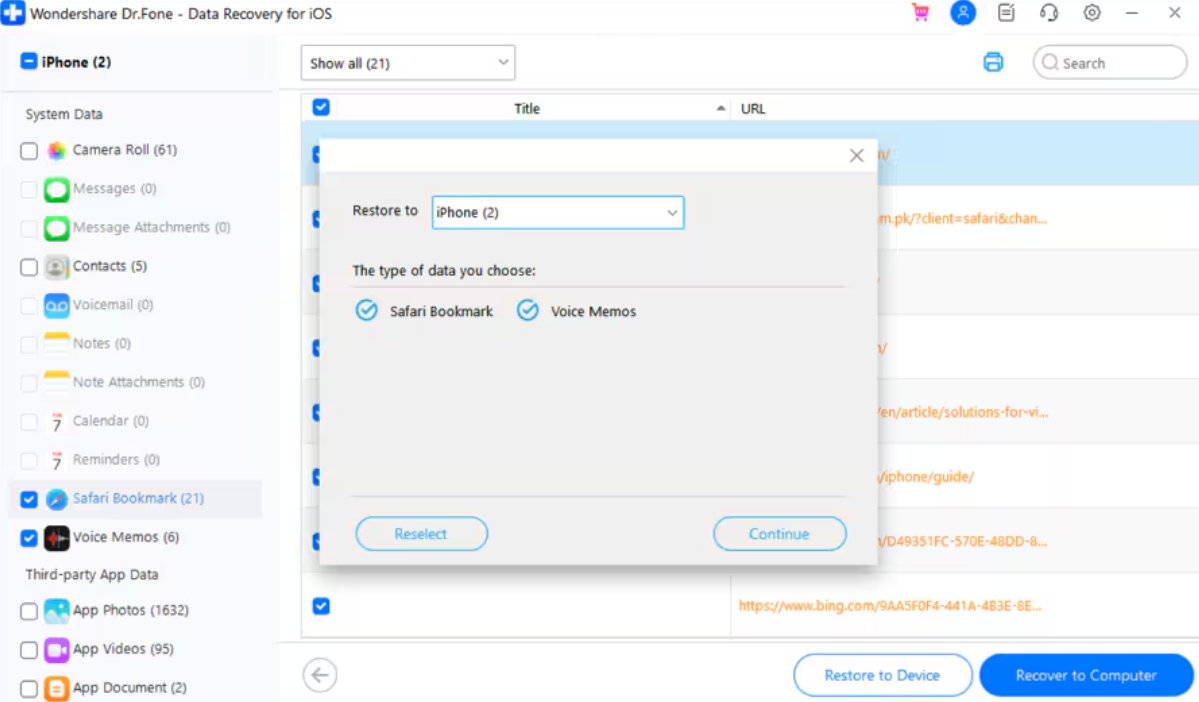
Step 3. Restore Needed Photos via Dr.Fone
After scanning completes, preview the results and select the photos you want to retrieve. Press “Restore to Device,” choose the location, then hit “Continue” to finish recovery.
Conclusion
To sum up, choosing the right path is vital for getting your lost iPhone photos back. You should always try the simplest native recovery options on your device first. However, some difficult situations require a more powerful and professional digital tool. Also, when nothing works, guided recovery software offers a safer and clearer solution. That is why Dr.Fone data recovery software becomes necessary for reliable photo recovery.